The BFC SDK comes equipped with a set of pre-built Big Fish Games experiences. They can be easily and quickly integrated into any Big Fish mobile game to provide a consistent experience for basic game personalization features like Player Login, and Player Profile Management.
Although these experiences by default reflect the look and feel of the Big Fish brand, they can be customized to fit the look and feel of individual games by changing the skin and layout of individual features.
See the Personalizing the Built-in Experiences section to find out how to personalize these experiences.
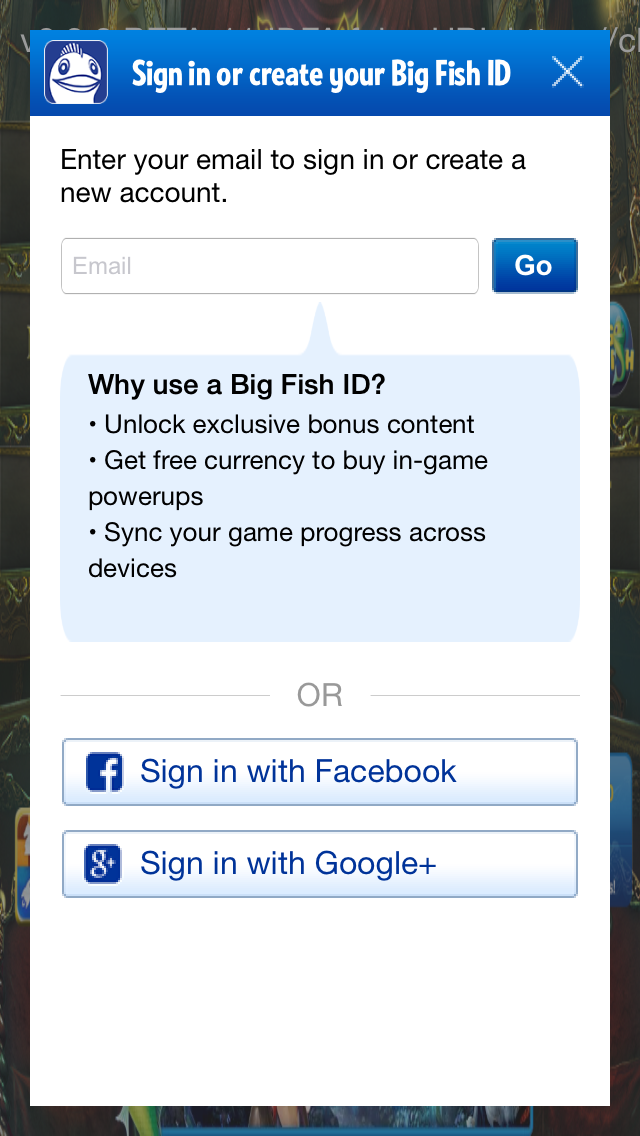
Player Login Experience#
The default login flow allows players to access their Big Fish gamer account or create a new one using the following methods:
Email — sign in with an email address associated with player’s Big Fish ID account
Facebook — log in or create a new account using Facebook credentials
Google (Android only) — log in or create a new account using Google credentials
Apple (iOS only) — log in or create a new account using Apple credentials
Note
As of BigFishScenePack version 4.5.0, creating a new account via Email is no longer supported. Email can only be used to sign in to an existing Big Fish ID.
In order to integrate this scene it’s important that the Facebook and Google apps used in the Rave integration are properly configured. Please see Integrating Third Party Authentication section for instructions on how to configure the social networks apps.
The Newsletter Opt-In callback may be triggered automatically as part of the login flow (e.g. if the user logged in via Facebook or Google and shared their email). See the Newsletter Opt-In Flow section for full details.
To integrate the login experience:
RaveAuthHomeScene * authHomeScene = [RaveAuthHomeScene scene];
authHomeScene.completionHandler = ^(RaveCallbackResult result, NSError * error) {
    if (result == RaveResultError) {
      // handle error
    } else if (result == RaveResultCanceled) {
      // handle canceled
    } else if (result == RaveResultSuccessful) {
      // handle successful
    }
};
[authHomeScene show];
Registering and Handling Login Callbacks#
RaveSocial provides key Scene and Login status callbacks that a developer can register and listen to.
Login Status Notification#
The general Login Callback (not to be confused with the RaveLoginScene callback) is used to notify the developer
that a login status change of some kind has occured. This is useful because it may indicate that some social features
are now available.
[RaveSocial setLoginStatusCallback:^(enum RaveLoginStatus status, NSError * error) {
  if (status == RaveLoginError) {
    // respond to the error condition
  } else if (status == RaveLoggedIn) {
    // respond to loggedIn status
    // at thish time you may also check different fields of the current user
    // by accessing RaveSocial.usersManager.current
  } else if (status == RaveLoggedOut) {

  }
}];
Directly Logging In to Authentication Providers#
If using the built-in Big Fish Login experiences is not desired, developer can build completely custom login experience using Rave’s login APIs.
Using our loginWith API, you can directly invoke a login via Facebook or Google. Please use the following
constants:
FacebookGoogle
[RaveSocial loginWith:@"Facebook" callback:^(NSError * error) {
    //  result handler
}];
Checking Readiness of Authentication Providers#
Just like with the direct login API - you can also see if an authentication provider is ready to be used. “Readiness” indicates
that a user has connected this social account to their Rave Social account and also that the token or local
authentication for this social account was successful. Call convenience functions in RaveSocial to check a plugin’s
readiness. If a plugin is not ready but you desire a ready status, use the matching connect methods in RaveSocial
to establish a connection with the the desired plugin.
[RaveSocial checkReadinessOf:@"Facebook" callback:^(BOOL isReady, NSError * error) {
  //  handle result
}];

//  connecting to Facebook if it fails a readiness check
[RaveSocial connectTo:@"Facebook" callback:^(NSError * error) {
  if (error) {
    // handle error
  } else {
    // success
  }
}];
Player Profile Management Experience#
The profile management experience screen allows players to build out their game profile by adding a profile picture, email, and display name, as well as connecting various social networks to connect with friends.
This screen will also have a link to login or sign-up if the user hasn’t done so already.
To integrate the Profile Management experience:
RaveAccountInfoScene * accountInfoScene = [RaveAccountInfoScene scene];
accountInfoScene.completionHandler = ^(RaveCallbackResult result, NSError * error) {
    if (result == RaveResultError) {
      // handle error
    } else if (result == RaveResultCanceled) {
      // handle canceled
    } else if (result == RaveResultSuccessful) {
      // handle successful
    }
};
[accountInfoScene show];
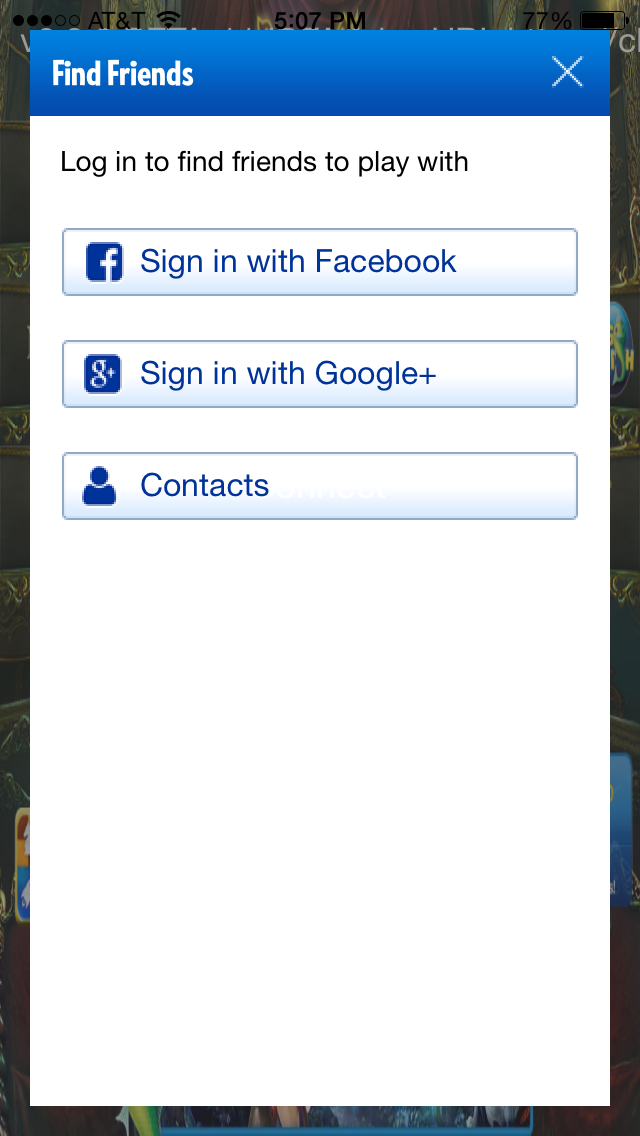
Find Friends Experience#
The Find Friends screen allows the player to connect their Facebook and Google accounts, and their local Phonebook to find friends who are also playing Big Fish games.
As the player connects his social network account to his gamer account, Rave will keep track of which of player’s friends are also playing Big Fish games and will add those friends to the list of player’s gamer contacts. These friends will be available in games for in-game interactions such as sending gifts to them and for social leaderboards.
To integrate the Find Friends experience:
RaveFindFriendsScene * findFriendsScene = [RaveFindFriends scene];
[findFriendsScene show];
Personalizing the Built-in Experiences#
The built-in Big Fish game experiences reflect the look and feel of the Big Fish brand, but they can be customized to fit the look and feel of individual games by changing the skin and layout of individual components. The look and feel of the screens can be changed by modifying the resource files that were used to build the screens.
The Rave SDK UI framework allows for native Android and iOS UI to be generated using XML- and CSS-based UI definitions. An individual screen (called a Scene in the SDK) is a combination of XML and native code used to lay out and provide UI functionality. Scenes are generally used for full-screen or dialog-based UI layouts, such as Login or Account Management. Widgets are smaller UI building blocks, such as a button with specialized behavior.
Every built-in experience has at least one XML layout and at least one controlling class, called the Scene class. The Scene class is native code.
Scene Resources#
The scene XML can refer to resources in the local app configuration, such as images, fonts or other XML. Resources can be redefined dynamically via an app configuration bundle and distributed live using the Rave backend service. The default location for resources on Android is in the assets folder of the game or app. The default location in iOS is in the Scene Pack’s resource bundle. Both platforms can share the same resources.
Changing the Look and Feel#
In order to change the color scheme, the skin or individual text or images used in the creation of the built-in experience, the individual assets need to be created and replaced in the exact file structure used in the project. Once replaced the project needs to be restarted for changes to take effect.
Attention
It is important the file structure stays intact so that the SDK and the logic in the Scene class are able to find the assets. Failing to do so may result in an error or an app crash.
Changing Layout#
Since all UI elements in the built-in experiences are dynamically created from XML and CSS scene resource descriptions, only the XML and CSS files need to be modified to change the screen layout. Similarly to the look and feel changes, the project needs to be restarted for those changes to take effect.
Changing Functionality#
If using the built-in Big Fish game experiences is not appropriate for a game, you can build completely custom game UI by using Rave’s data APIs. These APIs expose all functionality available through the Rave system and are used to build the built-in experiences.
For example, instead of integrating the built-in Login screen, you can build a custom login UI by using Rave’s login APIs.
Remotely Updating the Look and Feel of the Experience#
Since all UI elements used in the built-in experiences are dynamically created from resource files, by changing the resource files the look and feel can be modified. Rave supports remote upgrades of these resources. The Rave SDK regularly queries the backend service to check for updated resource files. Resource bundles with new contents can be uploaded through the Rave Developer Portal.
To update UI resource files remotely:
Copy the /resources folder included in the project (and the SDK distribution) to another location where it can be modified safely. Make appropriate changes to individual asset files, CSS and XML files without changing their location.
Once done making changes, create a zip archive from the resources folder called resources.zip.
Upload the file to the Rave Developer Portal. See REF GOES HERE for instructions.