Developer Portal#
Note
The Rave Developer Portal lets you manage your Rave-enabled applications. You can create new applications and configure them using the portal.
To integrate Rave into your mobile application, you need to create an application in your Rave Developer Portal. An application key will be created for each application created in the portal, which you will use when configuring Rave in your application. You may choose to create multiple applications in the portal for use with a single application since it may be helpful to have separate Rave applications for testing, staging, and production purposes.
The Rave Developer Portal also allows you to configure the following for each application
Achievements
Downloadable application configuration bundles
Gifts
Leaderboards and Tournaments / Timed Leaderboards
Friends and Followers lists
Creating an Application#
Log in to your Rave Developer Portal
Select the “Apps” tab and click on the “Add new app” icon
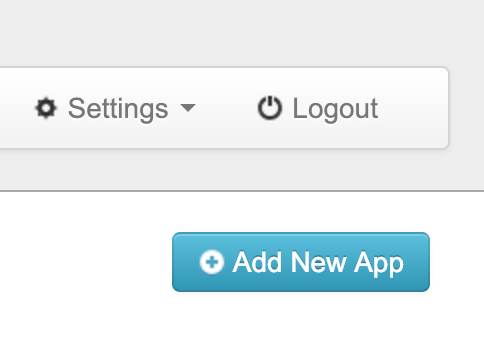
Specify a unique application name and click the “Add New App” button
Make note of the application key that is assigned to your application. It is a 32-digit hex number that you will need when configuring the SDK.
You should now see the new application in the application list.
Configuring an Application#
To change any application settings, click on the “Configure app” button for the application.

Application Settings and Third-Party Integrations#
Note
If you plan on using Facebook, or Google integration in your application, you need to provide some information about the applications you have created on those platforms for use with your Rave application.
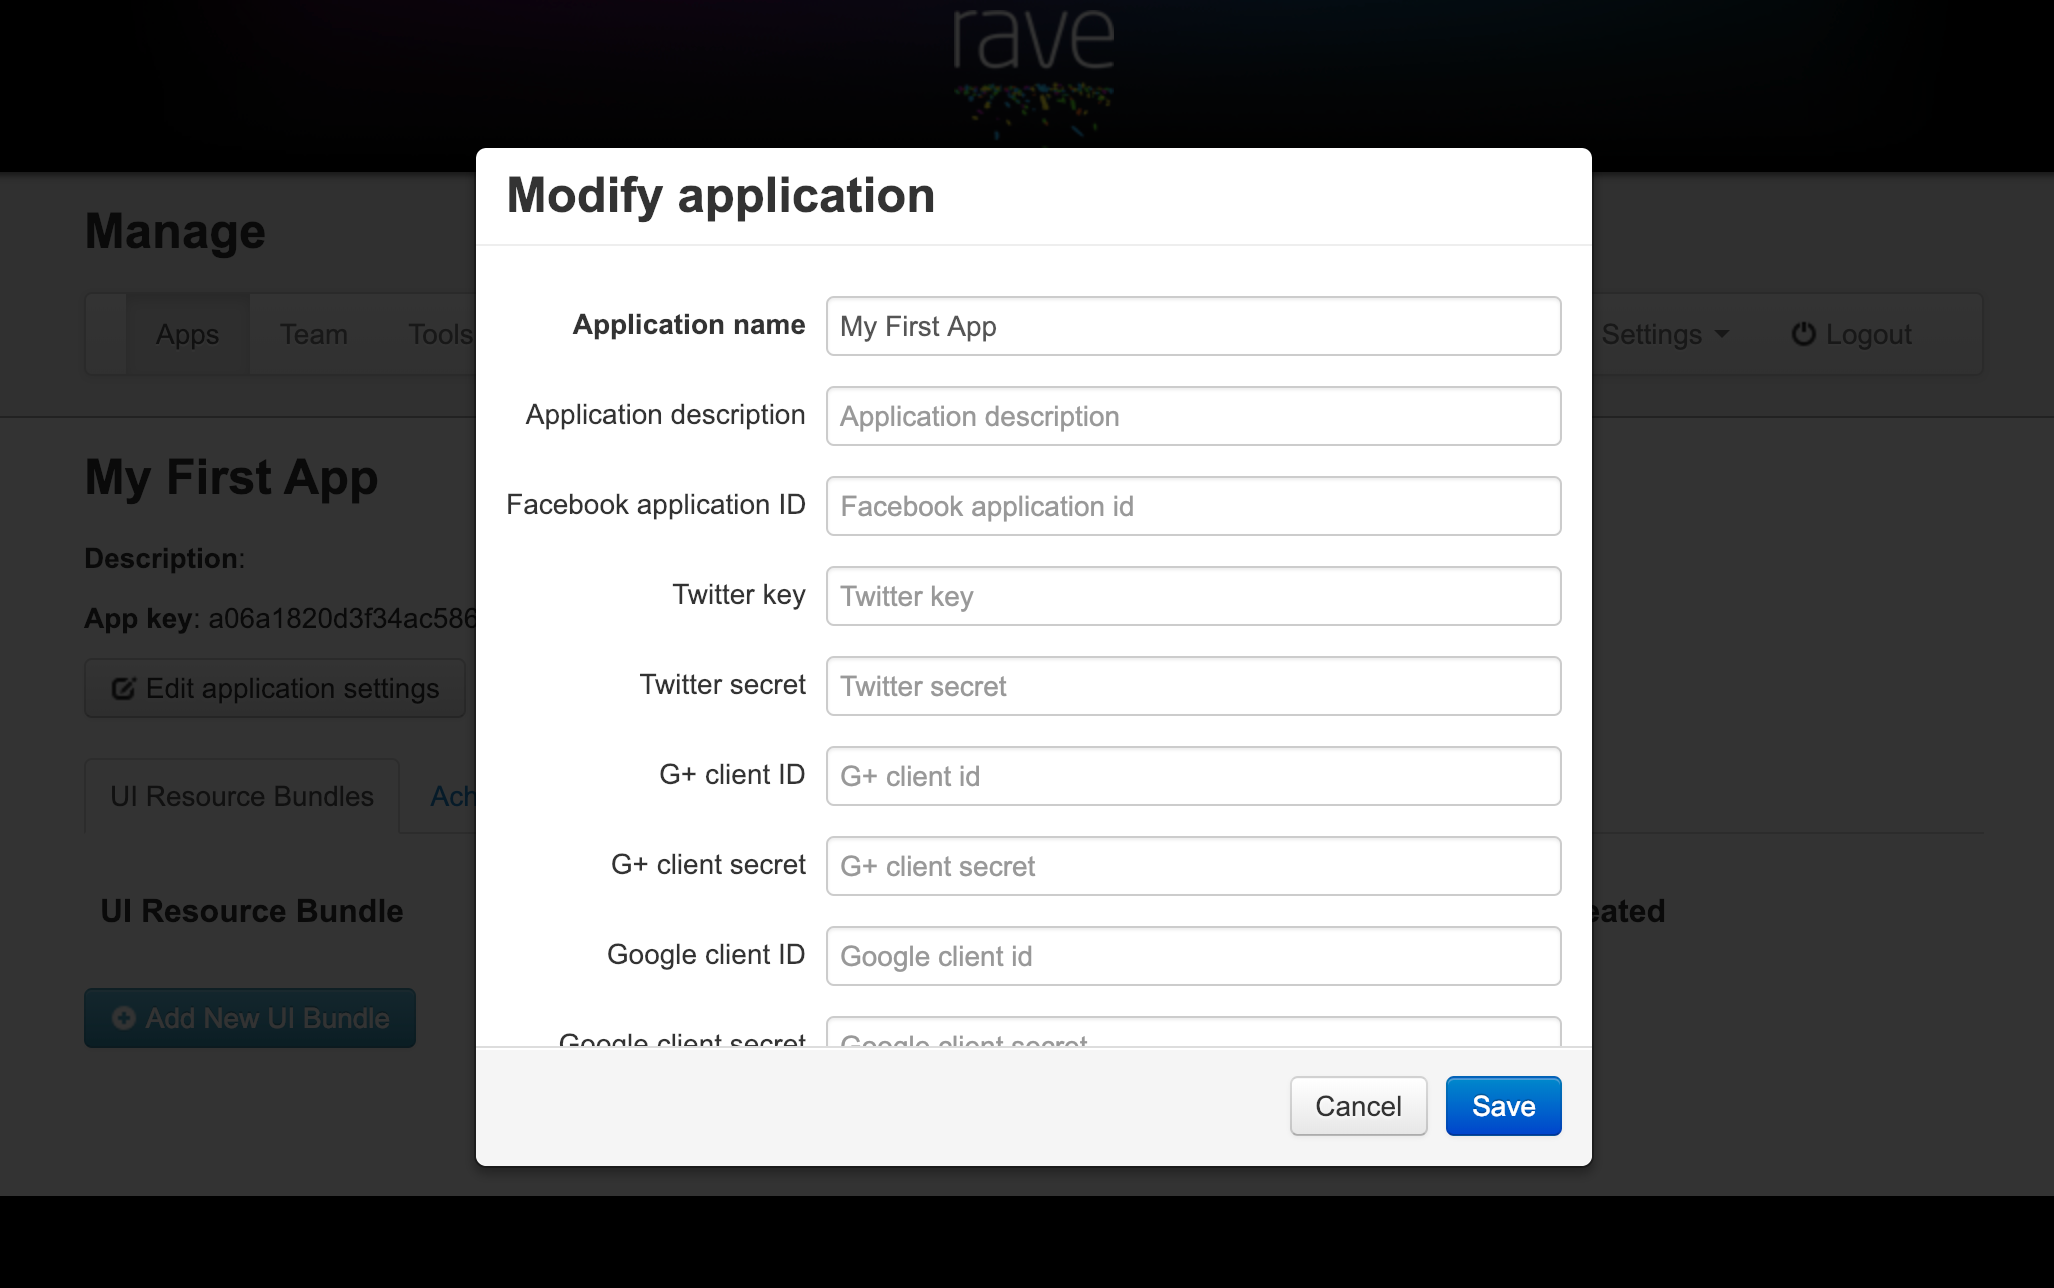
Click the “Edit application settings” button
Make the changes you want to the configuration
Click the “Save” button
Setting |
Description |
|---|---|
Application title |
The name of the application. The length is limited to 100 characters. |
Application description |
An in-depth description of the application. The length is limited to 1024 characters. |
Facebook application ID |
The Facebook application ID associated with your mobile application. If you are using Facebook in your Rave-enabled application, you should specify the Facebook application ID. |
Google client ID |
The Google client ID associated with your mobile application. If you are using Google in your Rave-enabled application, you must specify the Google client ID and secret. |
Google client secret |
The Google client secret associated with your mobile application. If you are using Google in your Rave-enabled application, you must specify the Google client ID and secret. |
User value scope |
Selects the scope for profile images and display names in the application. If the ‘app’ option is chosen, display names and profile images set in the app will only be used in this app. If the ‘global’ option is selected, display name and profile image are shared across all other apps that have ‘global’ scope selected. |
Achievements#
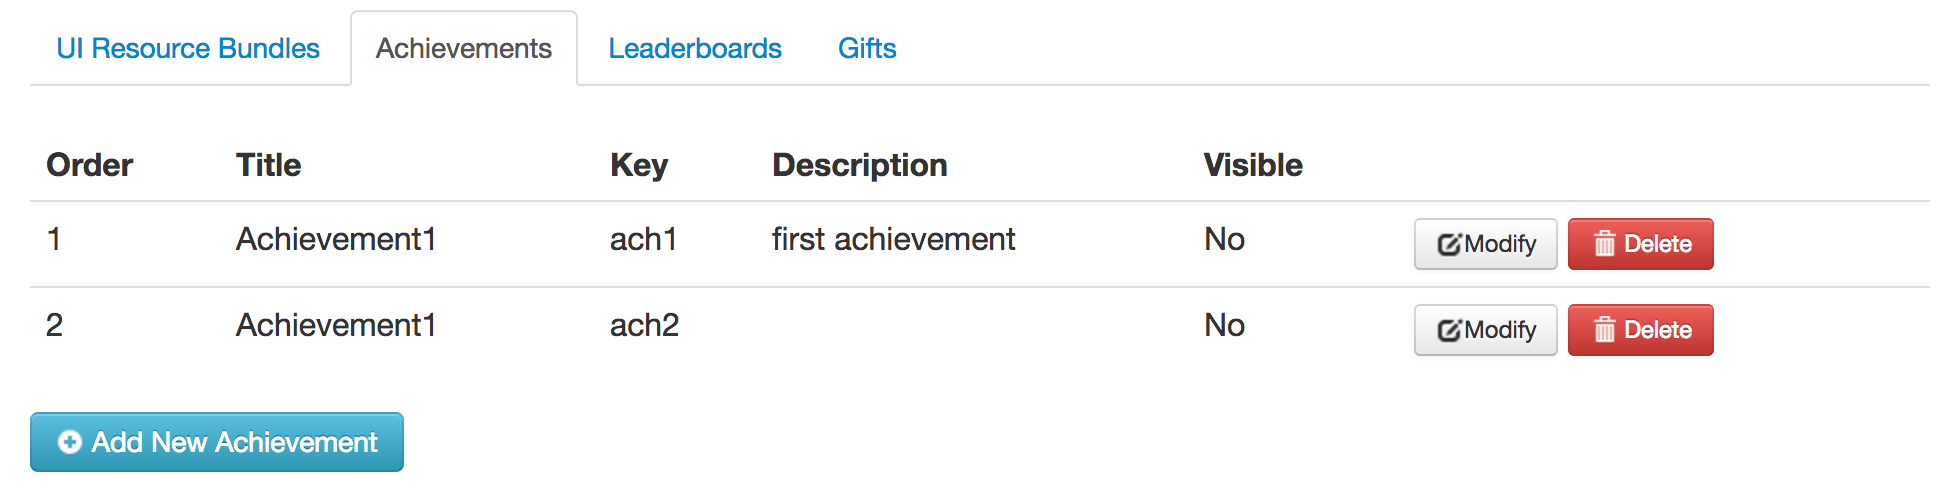
Select the “Achievements” tab on the left side of the screen to manage achievements. A list of the achievements defined for the application will be displayed.
Settings#
The following settings are available when adding and modifying achievements.
Setting |
Description |
Required |
|---|---|---|
Achievement name |
The name for the achievement that will be shown to your application users. The length is limited to 255 characters. |
Yes |
Achievement key |
A unique identifier in the context of your application that identifies the achievement. This value should not be changed once it has been set. The key is what you will use to reference a particular achievement in your application code. The length is limited to 100 characters. |
Yes |
Description |
A description that provides more detail on the use of the achievement. The length is limited to 255 characters. |
No |
Order displayed |
Determines the place of the achievement in the achievement list. This order determines what the next achievement is for a user based on the highest-numbered achievement that they have completed. This must be a positive integer. |
Yes (automatically set when adding an achievement) |
Visible |
Sets whether an achievement is visible in the application. Achievements that are not visible will not show up in the achievement list, cannot be referenced individually, and cannot be marked as achieved. |
Yes |
Adding an Achievement#
Click the “Add an achievement” button
Specify an achievement name, key
Click the “Save” button
Modifying Achievement Settings#
Click the “Modify” button for the achievement that you want to modify
Modify the settings you wish to change, keeping in mind the restrictions outlined in the “Settings” section
Click the “Save” button
Deleting an Achievement#
Click the “Delete” button for the achievement that you want to delete
Confirm that you want to delete this achievement
Configuration Bundles#
Configuration bundles contain updated resources that can be uploaded to the portal and subsequently downloaded by applications, allowing remote updating of the application’s look and feel. For more information on how to create configuration bundles, see the Rave Developer Portal section.
Select the “UI Resource Bundles” tab on the left side of the screen to manage configuration bundles. A list of the uploaded configuration bundles for the application will be displayed.

Application Version Filtering#
Since your application may have different resource bundle requirements as it evolves, the option to only use an uploaded bundle for a specified application range exists. If you want an uploaded resource bundle to be used with all application versions, do not specify a min or max version when uploading the bundle.
The Rave SDK automatically derives the application version number from your application. The source of the version number is platform dependent, with the sources for each platform as listed below:
iOS: BundleVersion in Info.plist
Android: android:versionName set in the
<manifest>element of the manifest file or the Gradle build file
The expected version number format is a two-period-separated list of positive integers, e.g. 4.1.2. If your version number does not adhere to that exact format, the following rules are applied to derive Rave’s version of the application number:
A version string is truncated at the first character not in the set
[0-9.]. A version string is also truncated if consecutive periods are encountered For example, all of the following strings would be interpreted as version1.2.0:1.2.0-beta,1.2.0a,1.2a,1.2..3A version string with a leading period is prepended with
0. For example, all of the following would be interpreted as version0.6.0:0.6,.6,.6.0A trailing period in a version string is ignored.
Settings#
The following settings are available when adding and modifying achievements.
Setting |
Description |
|---|---|
UI Bundle name |
A name to reference the configuration bundle in the portal, e.g. “Holiday app skin” |
UI Bundle file |
Use this to locate the resource file locally on your computer for upload to the portal |
Min version |
The minimum app version that the bundle can be applied to. |
Max version |
The maximum app version that the bundle can be applied to. |
Supported devices |
Indicates which device types this bundle can be downloaded by (iOS small = iOS phone and iPod, iOS large = iPad) |
Uploading a Configuration Bundle#
Click the “Add New UI bundle” button
Specify a name for the bundle
Select the resource file to upload
Click the “Add” button
Attention
An uploaded bundle is never automatically set as the current active bundle. To have an uploaded bundle be available for download, you must set it to be active. This allows you to upload bundles before you actually want them to be downloaded by devices.
Activating a Configuration Bundle#
Click the “Modify” button for the bundle that you want to activate
Select the device types in the “Set current for” list that you want to activate it for
Click on the “Save” button
After activating a configuration bundle, you will see icons in the “Current” column reflect which device types it is active for.
Deleting a Configuration Bundle#
Click the “Delete” button for the configuration bundle that you want to delete
Confirm that you want to delete this configuration bundle
Gifts#
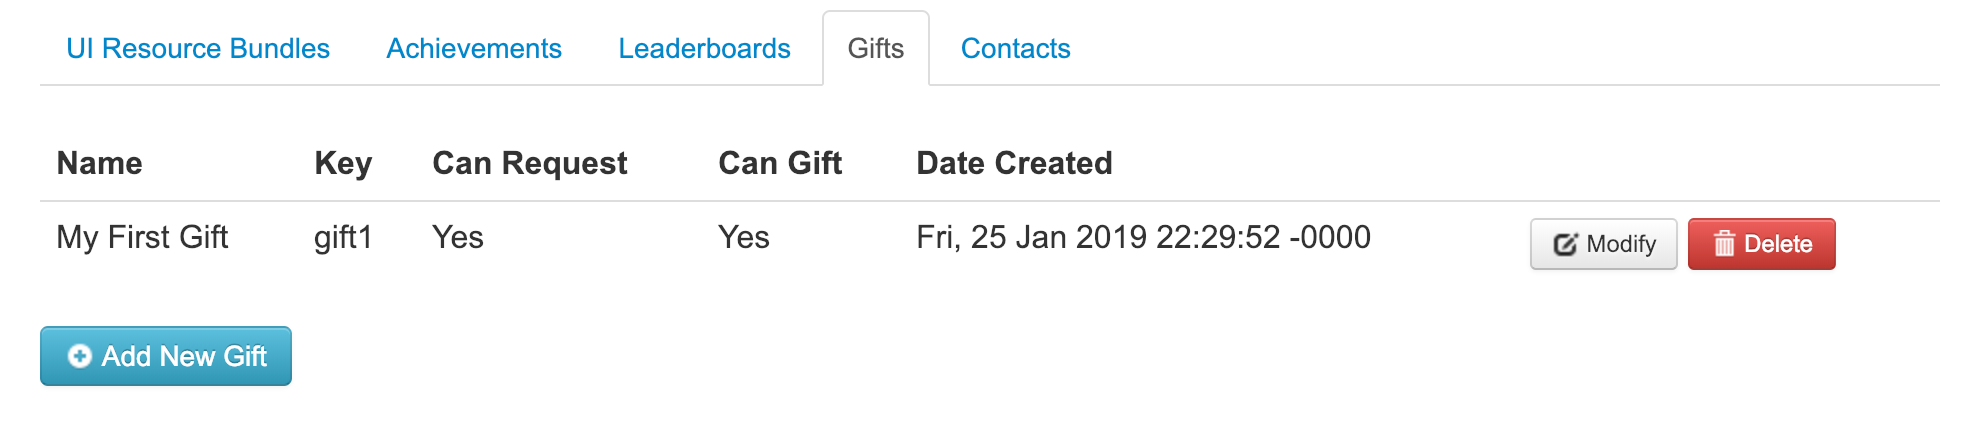
Select the “Gifts” tab on the left side of the screen to manage gifts. A list of the gifts defined for the application will be displayed.
Settings#
The following settings are available when adding and modifying gifts.
Setting |
Description |
Required |
|---|---|---|
Gift name |
The name for the gift that will be shown to your application users. The length is limited to 255 characters. |
Yes |
Gift key |
A unique identifier in the context of your application that identifies the gift. This value should not be changed once it has been set. The key is what you will use to reference a particular gift in your application code. The length is limited to 100 characters. |
Yes |
Can be requested |
Sets whether the gift can be used in a request, where one user requests it from another user |
Yes |
Can be gifted |
Sets whether the gift can be directly given to another user |
Yes |
Adding a Gift#
Click the “Add a gift” button
Specify a gift name, key, and what type of gift it is
Click “Save”
Modifying Gift Settings#
Click the “Modify” button for the gift that you want to modify
Modify the settings you wish to change, keeping in mind the restrictions outlined in the “Settings” section
Click “Save”
Deleting a Gift#
Click the “Delete” button for the gift that you want to delete
Confirm that you want to delete this gift
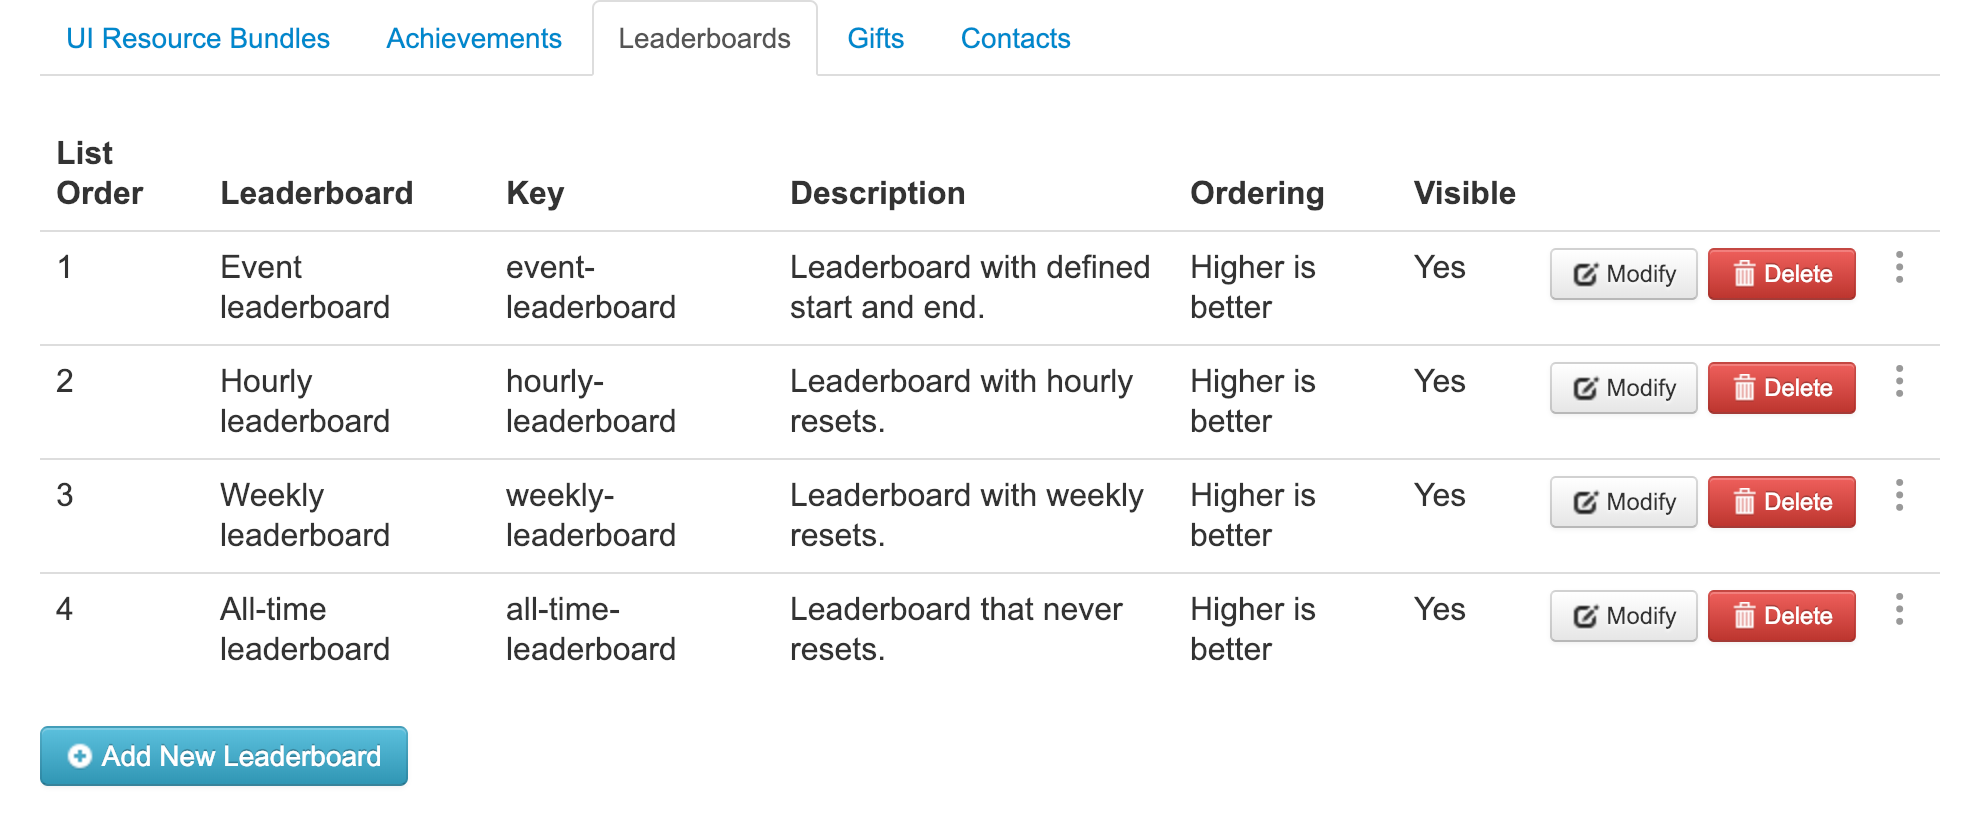
Leaderboards and Tournaments / Timed Leaderboards#
Click on Settings for your app, and select the “Leaderboard” tab to manage leaderboards. A list of the leaderboards defined for the application will be displayed. Leaderboards are sorted by their “ordering” value. Leaderboards that are not configured to be visible are listed after the visible leaderboards.
Settings#
The following settings are available when adding and modifying leaderboards.
Setting |
Description |
Required |
Value type |
|---|---|---|---|
Leaderboard name |
The name for the leaderboard that will be shown to your application users. The length is limited to 255 characters. |
Yes |
A string |
Leaderboard key |
A unique identifier in the context of your application that identifies the leaderboard. This value should not be changed once it has been set. The key is what you will use to reference a particular leaderboard in your application code. The length is limited to 100 characters. |
Yes |
A string |
Description |
A description that provides more detail on the use of the leaderboard. The length is limited to 255 characters. |
No |
A string |
Score ordering |
Determines whether the leaderboard considers higher or lower scores to be better scores. Once this value has been selected, it should not be changed if any scores have been submitted to the leaderboard. |
Yes |
“asc” for higher-is-better, “desc” for lower-is-better |
Reset frequency |
Specifies the interval at which the leaderboard should be reset. This parameter should not be set at all for leaderboards that are never meant to be reset (all time leaderboards) |
No |
Dropdown selection |
Schedule start |
Date when the leaderboard begins. Prior to this date submitting a score to this leaderboard will result in error 478 from the server stating: “The leaderboard is read only.” |
No |
Date (dd/mm/yyyy) |
Schedule end |
Date when the leaderboard ends. After this date submitting the score to this leaderboard will result in error 478 from the server stating: “The leaderboard is read only.” |
No |
Date (dd/mm/yyyy) |
Visible |
Sets whether a leaderboard is visible in the application. Leaderboards that are not visible will not show up in the leaderboard list, cannot be referenced individually, and cannot have scores submitted to them. |
Yes |
“true”, “false” |
Adding a Leaderboard#
Click the “Add a leaderboard” button
Specify a leaderboard name and key
Optionally specify a description and set the score order, reset frequency and schedule.
Select the “Visible” checkbox if you want the leaderboard to be available immediately in your application
Click “Save”
Modifying Leaderboard Settings#
Click the “Modify” button for the leaderboard that you want to modify
Modify the settings you wish to change, keeping in mind the restrictions outlined in the “Settings” section
Click “Save”
Deleting a Leaderboard#
Click the “Delete” button for the leaderboard that you want to delete
Confirm that you want to delete this leaderboard
Download Leaderboards#
You can download a CSV file that contains all scores submitted so far to a leaderboard. For leaderboards with a reset schedule the CSV file will contain all scores submitted since the last reset.
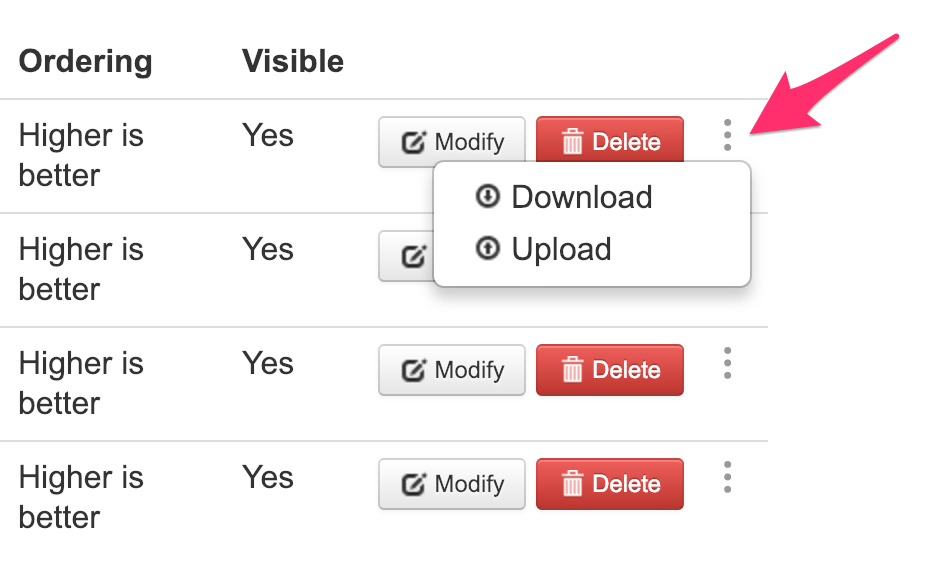
To download the list of leaderboard scores, click (…) to find Download / Upload menu and select Download.
Upload Leaderboards#
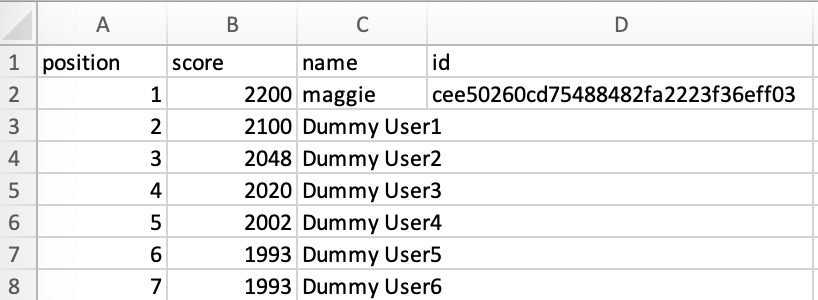
You can pre-populate a leaderboard with scores by uploading a CSV with scores. In order to do that, prepare a CSV file with rows with values for the following columns:
Position: Integer that defines position on the leaderboard
Score: Numerical value for the score
Name: Name of the user
ID: Rave ID of the user. If you leave this value empty the system will assign an arbitrary Rave ID
Example of CSV can be seen below
Tools#
Select the “Tools” tab in the main navigation tab to access tools that help you manage and troubleshoot your apps.
User info#
The “User Info” tool lets you view information about Rave users that have used at least one of your applications. You can look them up either by specifying their Rave ID, which is a 32-digit hex number, or one of their FB UIDs.
Leaderboard Management#
The “Leaderboard Management” tool lets you remove scores from leaderboards. The steps to remove one or more scores for a user are:
Select the app from which you want to delete scores from the drop-down menu
Enter the Rave ID, which is a 32-digit hex number, for the user
Click the “Get leaderboard info” button. Scores for all leaderboards that the user has submitted a score will be displayed
Delete individual scores by clicking the “Delete” button next to them or click the “Delete all” button to delete all of the user’s scores in the application
Settings#
2-Factor Authentication#
Two-factor authentication (2FA) provides an additional layer of security for your Portal account, requiring a second form of verification during sign-in. The portal utilizes the Time-Based One-Time Password (TOTP) method for this purpose. To activate 2FA for your account, follow the steps outlined below:
Navigate to Settings > 2-Factor Authentication in the main navigation tab.
Within the 2-Factor Authentication section, click on Enable Authenticator App.
Follow the instructions within the popup to set up your second verification method.
Note
Once 2FA is enabled, you’ll be required to provide the 6-digit code as a verification step every time you sign in.
Managing Backup Codes#
Backup codes provide an alternative way to verify your identity if you can’t access your second verification method. They are essential for maintaining access to your account.
To view or regenerate your backup codes:
Under 2-Factor Authentication section, click Backup Codes.
In the popup, you can confirm your identity and view your codes. There is also an option to download these codes for safekeeping.
If you wish to create a new set of backup codes, click on Generate new codes.
Warning
It’s critical to keep your backup codes in a secure yet easily accessible location. If you lose access to your 2FA method and don’t have your backup codes, the only way to regain access to your account is by having a portal admin disable your 2FA. Once disabled, you will need to set up 2FA again.
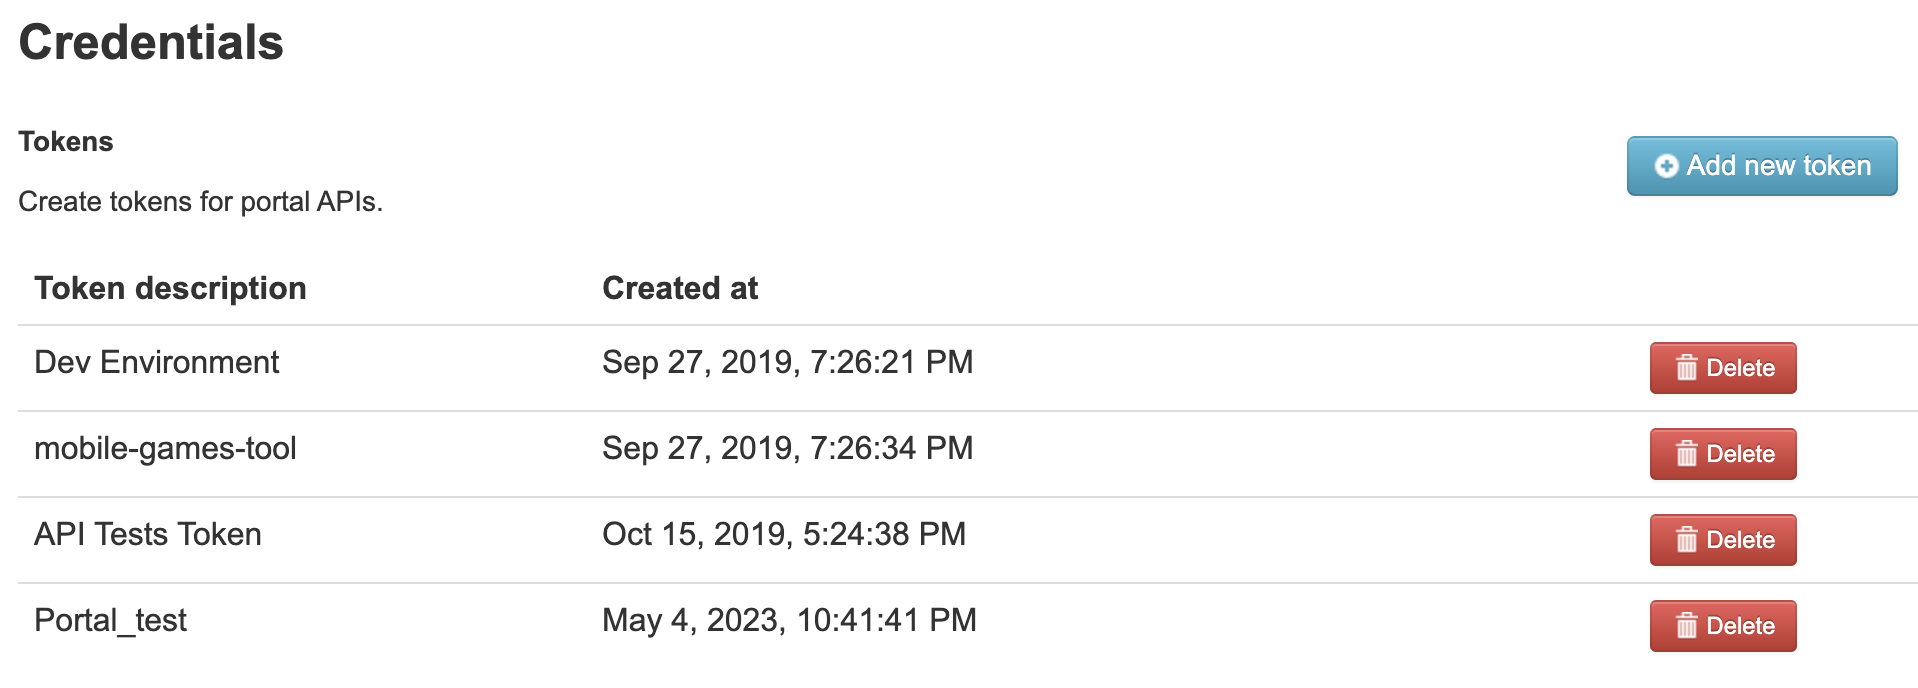
Credentials#
The Credentials page (accessed via Settings > Credentials) allows the management of API tokens and OAuth 2.0 client IDs, which are used as a form of authentication with the Portal API and server-to-server APIs respectively.
API Tokens#
API tokens authenticate requests to the Portal API. Further details on the Portal API are available in the Portal API (Management API) section.
To generate an API token:
Go to Settings > Credentials.
Click Add new token.
Provide a unique and descriptive identifier for the token.
Click Add.
The token will be displayed right after creation. Ensure you copy this token and store it in a secure location, as this is the only time it will be shown. If lost, the token cannot be recovered and you will need to generate a new one. For security reasons, lost or compromised tokens should be promptly deleted from the Portal.
OAuth 2.0 Client IDs#
OAuth 2.0 client IDs serve as credentials for server-to-server APIs.
To create a new OAuth 2.0 client ID:
Navigate to Settings > Credentials in the main navigation tab.
Click Add OAuth client ID.
Provide a descriptive name for the OAuth client.
Click Add.
Once the OAuth client is created, locate it in the list. Click Modify to view detailed information, including the client ID and Secret. The client secret can also be reset if necessary.
Note
Be sure to securely store your API tokens and OAuth 2.0 client IDs/Secrets.
API#
Certain API settings can be configured directly through the Developer Portal and are applied on a per-customer-environment basis. To adjust these settings, follow these steps:
Navigate to Settings > API in the main navigation tab.
Locate the setting you wish to modify.
Enter or select the new desired value.
Once you are done with the changes, click Apply.
A popup window will appear to review your changes. Please carefully double-check the changes to be applied.
If all the changes are correct, click Confirm to finalize the modifications.
Note
API settings are not application-specific. Any changes will affect all applications associated with your account.
The following settings are available:
Setting Name |
Description |
Default Value |
|---|---|---|
Email Confirmation Required |
Set whether a new user account must confirm their email address before they can use their account. |
Disabled |
Email Confirmation Method |
Whether users confirm their email by clicking on a provided link or by entering a unique confirmation code sent directly to their email address. |
Standard (Link) |
Session Renewal |
Specifies whether existing sessions that haven’t expired can be renewed in order to extend its expiration time by the value set by Session Expiration. |
Disabled |
Session Expiration |
The amount of time in seconds an Authenticated Rave User Session will live before it expires. After the session expires, a user must re-authenticate. A value of 0 disables the feature. |
0s |
Token Expiry Duration |
The amount of time in seconds a Rave User Token is valid for before it expires and is no longer usable. |
3600s |
Lockout Max Attempt Count |
The number of failed password login attempts made within the Lockout Time Window that will cause a user’s account to become locked. A value of 0 disables the user account lockout value. |
N/A |
Lockout Time Window |
The length of time in seconds in which the system will count the number of failed password attempts until it reaches the Lockout Max Attempt Count value. If number of attempts equal or exceed that number within this time window, a user’s account will be locked. |
300s |
Lockout Period |
The length of time in seconds it takes for a user account that is locked from too many failed attempts to be automatically unlocked. The user’s account will be unlocked after this value is added to the locked_at time of a user’s account. A value of 0 will prevent the account from automatically unlocking. User’s can then only unlock the account by contacting support or successfully reset their password. |
N/A |
Lockout Send Email |
Specifies whether a user who’s account is locked out receives an email notification detailing the lockout and how to reset it. |
Enabled |
Lockout Expose Status |
Specifies whether the API should expose details about a user’s lockout status. While this may make it easier for developers to detect problems with user’s being locked out, it can aid in attackers having knowledge that can help automate their attacks. |
Enabled |
Email Sender |
The from address that is applied to emails send by the ClientAPI. This value should be an email that is recognized by the configured email sending service account used (SendGrid account). |
Empty |
Mail Subject Header |
A text that will appear at the beginning of the subject of every email sent. |
Empty |
Forgot Password URI |
A URI string that overrides the default Rave forgot password HTML pages. If this value is set, instead of sending the user to the Rave HTML page to reset their password, an email will be sent with a deep link to this URI. The deep link will include the reset password code. |
Empty |
Reset Password Redirect URI |
A URI string that overrides the default Rave HTML page after a successful password reset. If this value is set, instead of the API rendering a success HTML page, the service will redirect a user to this custom URI. |
Empty |
CORS Origins |
List of URIs that are allowed to perform cross-site posting to the Rave API. This value will be set in the access-control-allow-origin response header. |
Empty |
User Password Validators |
List of rules that determine the requirements for creating passwords. By defining rules, the system will enforce stronger security measures for passwords. Please note that rule changes may impact existing user accounts. |
Empty |
Passkey Relying Party ID |
A unique identifier for the Passkey Relying Party. It must match the browser’s request origin or be a ‘registrable suffix’ of it. |
Empty |
Passkey Relying Party Name |
A readable and user-friendly name used to identify the Passkey Relying Party. |
Empty |
Passkey Verify Timeout |
The duration in seconds within the user is required to complete the passkey verification process. |
60 |
Passkey Origins |
List of allowed URIs where the Passkey Verification will take place. Values should be a fully qualified domain names (FQDN). |
Empty |
Warning
Be careful when modifying these settings. Changes may significantly impact the behavior of your applications.
Note
After applying changes, it may take a few minutes for these to propagate to your applications. Expect a slight delay for your changes to take effect.
API Settings History#
The Portal keeps a history of all changes made to your API Settings. This enables you to view what changes were made, who made them, and at what time. Additionally, you have the ability to revert back to a point in your change history. To access the configuration history, navigate to the ‘API’ tab, and then click on ‘History’ right below the main navigation tab.
Reverting to a Past Configuration#
You can revert your API settings to any previous state in your change history. However, keep in mind that reverting will also undo any changes made after that specific point in history. To revert to a past configuration, follow these steps:
Navigate to API Settings History.
Find the history point you wish to revert to and click View.
Take time to carefully review the changes that will be reverted.
If you are certain about reverting, click Revert to apply the modifications.
Warning
Reverting to a past configuration will undo all changes made after that point. Ensure you review carefully all changes that will be applied before proceeding.
Templates#
Web templates#
The Web templates customization allows tailoring the appearance and content of web pages and emails within the applications. It provides flexibility for personalizing and modifying the templates according to customer specific branding and design requirements.
To get started with customizing the templates, navigate to Settings > Templates in the main navigation tab.
Downloading Current Web Templates#
You have the ability to download the most recent version of your web templates. By clicking the “Download” button, you initiate a download of a .zip file containing these templates. This feature is particularly useful if you need to back up or examine your current template setup.
Uploading New Templates#
In this section, you can upload new web templates to your environment. Through the “Upload Templates” button, you can select and upload a .zip file of new templates. The upload process is designed to automatically replace all existing template files in your environment with the new ones from the uploaded file. The functionality ensures that the uploaded files meet the specified format and file type criteria.
GitHub Integration for Automatic Deployment#
You can also automate the updating of your web templates through GitHub integration. You can fork a base assets project, generate a unique API token through the portal, and configure this token in your GitHub repository. This setup enables automatic deployment of any changes you push to a specified branch in your GitHub repository. The integration utilizes webhooks and the API token to securely update your environment directly from your repository.
Note
Templates are not application-specific. Any changes will affect all applications associated with your account.
GDPR#
Rave supports user data erasure workflows to help customers respond to privacy and data deletion requests, including GDPR-related requests.
Use one of the following options depending on the type of request:
- Portal API - User Deletion
Permanently deletes a Rave user and their associated data.
- Portal API - Facebook Identity Removal
Removes Facebook-related identity data from a Rave user by Facebook UID, without deleting the Rave user account.
- Developer Portal Tool
Lets support teams find and delete users manually through the Developer Portal UI.
GDPR - Portal API User Deletion#
Use this flow to find and permanently delete a Rave user through the Portal API.
Finding a user#
Before deleting a user, confirm that you have found the correct Rave user.
Users can be looked up through the Portal API using one of the supported query parameters:
Rave UUID
Email
Facebook UID
Reference: Get a Rave user
Deleting a user#
User deletion is performed by Rave UUID.
After finding and confirming the correct user, delete the user using the returned Rave UUID.
Reference: Delete a Rave user
When the deletion request succeeds, all information associated with that Rave user is permanently deleted from the Rave system.
Note
If you only have an email address, or Facebook UID, first look up the user through the Portal API, then delete the user using the returned Rave UUID.
GDPR - Portal API Facebook Identity Removal#
Use this flow when the request is specifically related to Facebook Login data, such as a Facebook user data deletion request.
Facebook identity removal deletes Facebook-related identity data from the Rave user, but does not delete the Rave user account.
Removing Facebook identity data#
Facebook identity removal is performed by Facebook UID.
Reference: Delete a Rave user’s Facebook identity data
When the request succeeds, Rave removes the Facebook-related identity data associated with that Rave user.
This operation does not delete the Rave user account and does not remove any non-Facebook identities associated with the user.
Caution
If Facebook is the user’s only authentication method, removing their Facebook identity may prevent them from accessing the same Rave-backed account unless they reconnect Facebook or have another authentication method linked.
GDPR - Developer Portal Tool#
Use this flow when your support team needs to find and delete a user manually through the Developer Portal UI.
Deleting a user through the Developer Portal#
To delete a user through the Developer Portal:
Open the Developer Portal.
Go to App Users.
Click Edit.
Look up the user using one of the supported identifiers:
Email
Rave UUID
Facebook UID
Confirm that you have found the correct user.
Click Delete user.
This permanently deletes all information associated with that Rave user from the Rave system.
Important
Deleting a user is permanent.
Before deleting a user, make sure the identifier belongs to the correct user and that the deletion request is valid.
If a user is deleted from Rave, they may lose access to their Rave-backed account, depending on how the game or application uses Rave authentication.
Facebook identity removal is different from full Rave user deletion. It only removes Facebook-related identity data and does not delete the Rave user account.
REST API#
The Portal REST API provides capabilities for managing application settings, user accounts, and backend configurations. Designed for administrative and integration purposes, it supports advanced management workflows and external system integrations.
To access the complete documentation, visit the Portal Rest API Documentation section.